
A DIY Roof Rack was one of the first projects I attempted for my camper conversion in 2018. With limited aftermarket roof rack options for the 2nd generation Transit Connect at the time, I decided to take a risk and figure a solution myself.
PROJECT GOALS:
After nearly 3 years use, this article will serve both as an assessment of what went right and what didn’t, and a how-to guide featuring how I would redo the project today. There will likely be an update later this summer to rework the rack and make cosmetic improvements
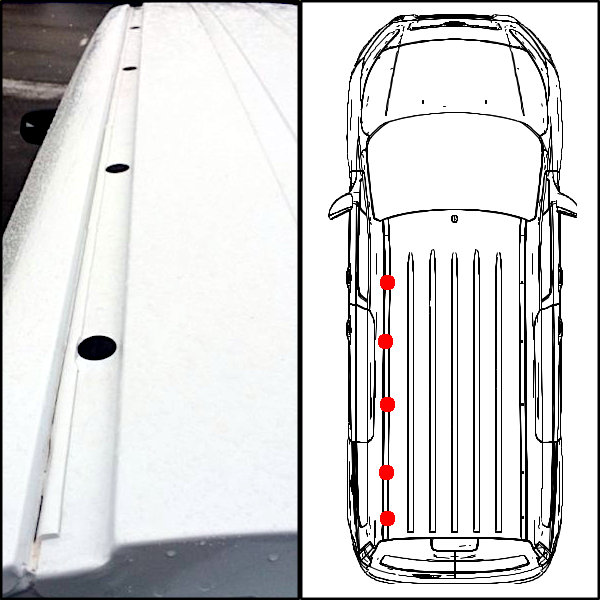
Throw a straight board length-wise across the stock roof rail holes and you can’t miss it. None of the surfaces at each location are flat to each other. Worse, they each slope outward AND either forward or aft, simultaneously, to create a complex contoured surface at each potential roof rack support location.
Early on I knew I wanted to use a length of aluminum angle along each rail to both support and hide the body of the solar panels. In order to do this, I decided to create flat surfaces for the rack supports. These surfaces also needed to seal against water intrusion.
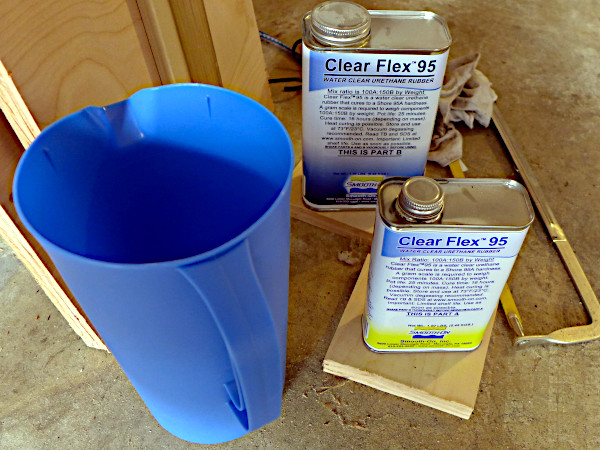
SOLUTION: Liquid Urethane
I selected solar panels with dimensions that would work with the roughly 46″ spaced roof rail hole arrays. I chose simple pine 2x4s to create the horizontal bracing of the roof rack and the vertical supports.
Dimensions:
Tool(s) to accurately cut 2 x 4s to length.
I wouldn’t have been able to do half the projects I’ve completed without metal punches.
Used to create holes in aluminum angles to join 2 x 4s, holes in the wooden vertical rack support legs, and mounting holes in the solar panels.
POST PROJECT NOTES:
POST PROJECT NOTES:
POST PROJECT NOTES:
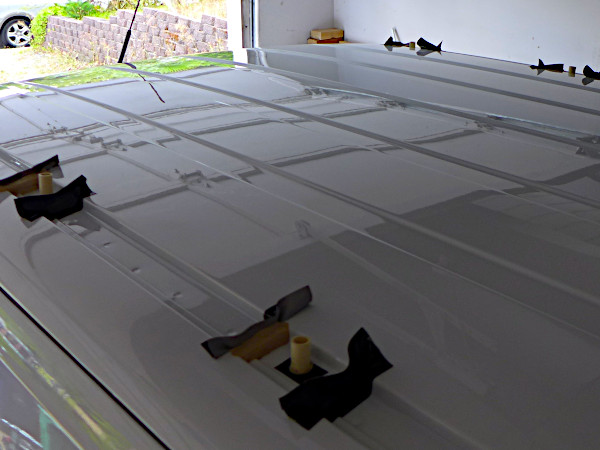
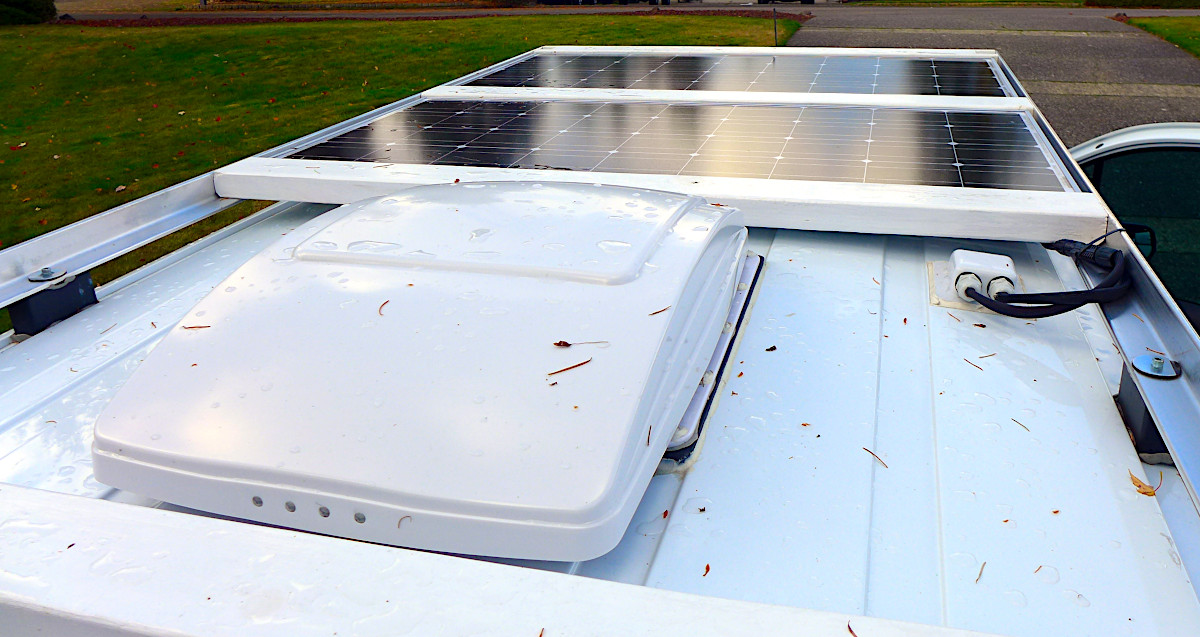
The design of the rack allowed for easy assembly off-vehicle. This way, the entire completed assembly could be lifted up onto the roof rack supports (with help) in one piece. Panels were attached underneath the 2 x 4s with typical solar panel “Z-brackets” and gapped with some simple rectangular plexiglass spacers I cut from material on-hand to achieve the slightly recessed panel upper surfaces.
CONNECTION NOTES:
After nearly 3 years of use, here’s what went right:
Three factors contributed to moisture accumulation mostly along the cab ceiling above the headliner. While two of these factors aren’t changing at the moment; living in the PNW, particularly in the winter and spring seasons, and the repeated creation of a large temperature differential by heating the van’s living/cargo area with my Wave 3 Heater, the third factor can. That is, improving the roof rack design to reduce interior condensation accumulation. Below are the highlights, fixes, and general construction improvements I’m planning on implementing later.
TAKE-AWAYS:
The only material that accumulated mold was the OEM sound deadening goop. The Noico sound deadening material had none.
TIP: For a new conversion, I would either remove it (heat gun) or seal in the OEM goop as a first order of business. I chose to seal it up with more Noico.
NOTE: I used too much Noico in this area. Only about 25% coverage is necessary to reduce panel resonance.
TAKE-AWAYS:
The Thinsulate only accumulated mold around the OEM sound deadening goop. Other areas underneath the roof rack fasteners were wet, but didn’t attract mold. Also, the Thinsulate did not pass any moisture through to the headliner, this was impressive performance as a hydrophobic barrier.
The stock headliner unfortunately doesn’t leave much room between the roof skin for experimentation. Lacking extra Thinsulate, I decided to test EZ-Cool as a replacement radiant barrier.
TAKE-AWAYS:
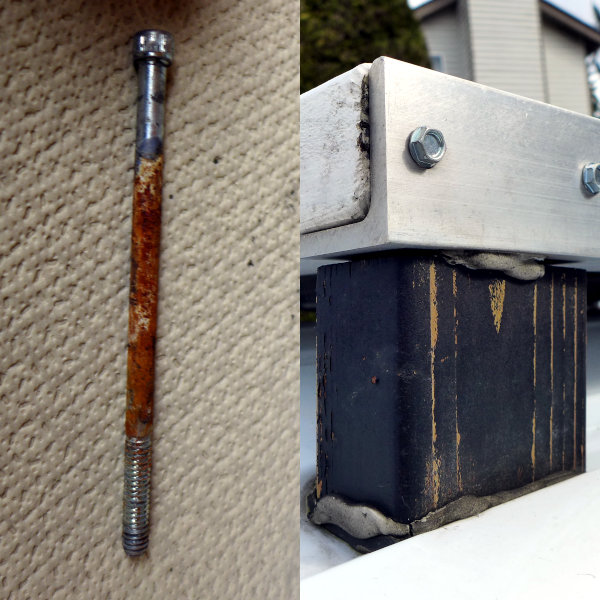
It wouldn’t have hurt to use stainless steel hardware! The real problem is the wood vertical support leg though. The finish wasn’t properly sealed (Plasti-Dip did not hold up) and the porous wood is likely trapping moisture in the fastener thru-hole and rotting.
TEMPORARY FIX: I cleaned up the length of the fastener with steel wool and coated it with marine grease until I have time for a permanent fix.
PERMANENT FIX: I could cut new lengths of wood for each of the vertical supports and finish all exterior surfaces with much more durable sealant. Instead, I’m planning on 3D-printing each leg in white UV-resistant ASA thermoplastic.
TAKE-AWAYS:
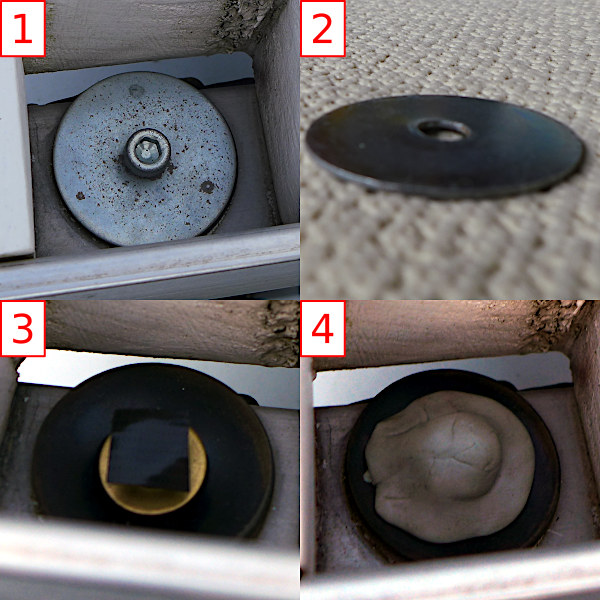
I used what I had on hand which happened to be fender washers. The mating holes on the aluminum angles were drilled oversize to aid in alignment of the roof rack to the stock rail holes. While the fender washers didn’t cause leaks, they were too thin causing deformation from fastener torque (2) and too large to properly seal exposed metal surfaces (1) resulting in thermal bridging and increased condensation in the van interior.
TEMPORARY FIX: I swapped a smaller, thicker washer, taped over the fastener drive hole (3), and applied butyl seal tape (4) to create the thermal break.
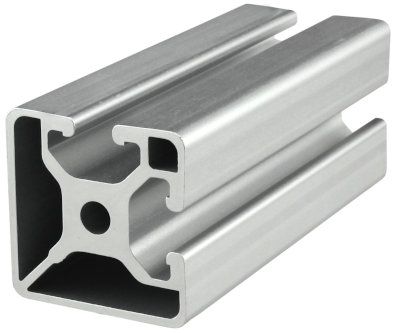
The wood used for the rack supports and horizontal bracing would’ve held up better if I had spent the time filling and sealing all of the cracks and knots. Choice of paint & primer could’ve been better too, perhaps some kind of bed-liner. I could redo each piece, but I think at this point I’d rather switch 40 series 8020 aluminum for the four braces despite the additional expense.
Estimate for Roof Rack Update: Late Summer